
From code to Canva: start structured, finish in the tool you like
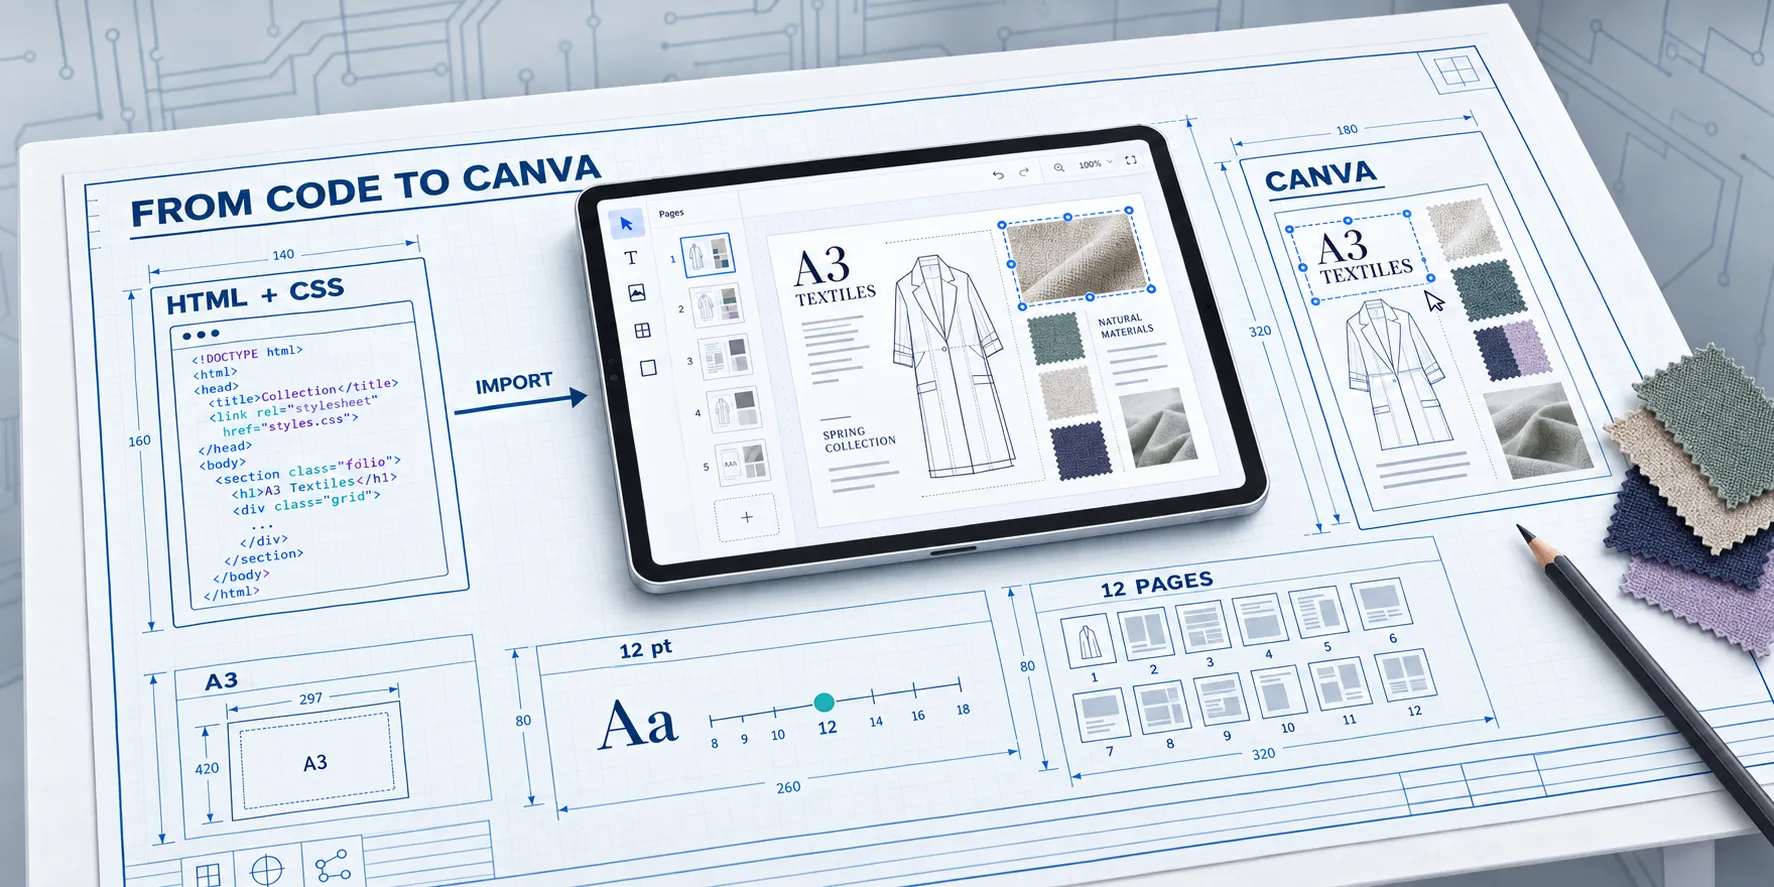
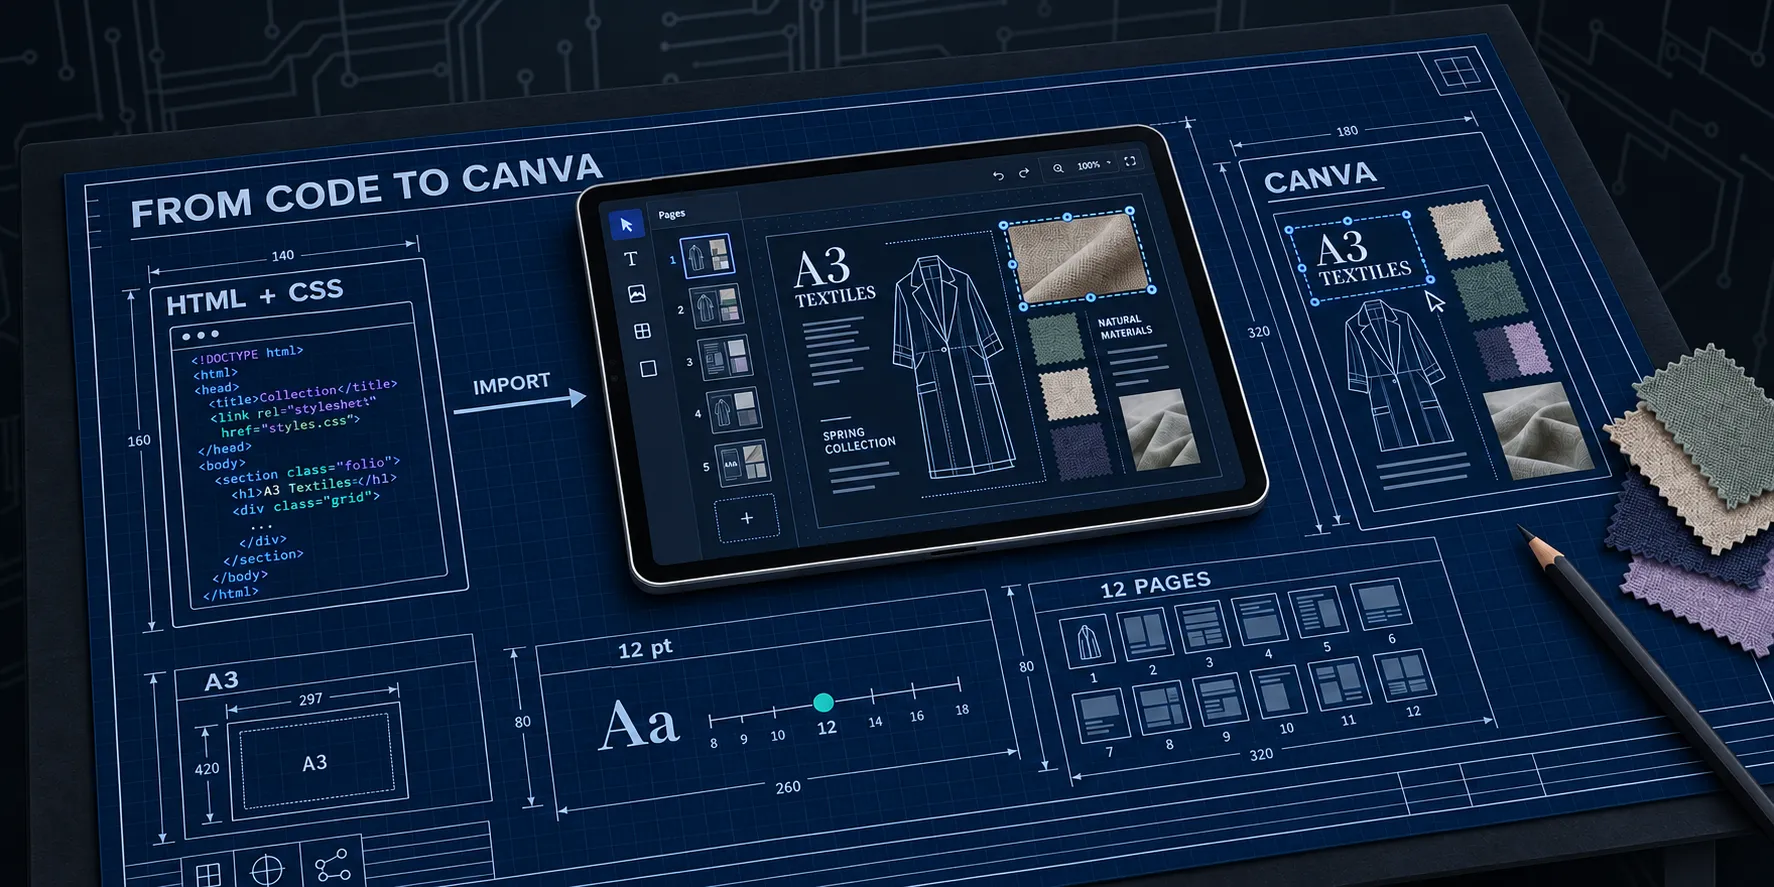
Most HSC (NSW Higher School Certificate) students design their major work folio in Canva or in an Adobe app. It’s free through school and it’s what they know. The students I asked hadn’t considered code at all. They reckoned it was too abstract for design work.
The hsc-major-work-example repository gets you both. Lay the folio out in code, where page limits and type rules are easy to check, then carry it into Canva and keep designing there.
The folio in the repository, “The Raven’s Ledger”, is fictional. The student is invented, the plates were generated by AI, and every number was made up. It shows a workflow, not work to copy. A real folio has to be the student’s own work, with any AI help acknowledged the way NESA and the school require. Responsible AI and the HSC covers where that line sits.
Why start in code
Each A3 page is a block in one HTML file, styled by a shared stylesheet. That’s a bit of setup for a textiles folio, but it gives you things a blank Canva page does not:
- The structure is fixed early. Twelve A3 pages in NESA’s section order: 2 for Design Inspiration, 3 for Visual Design Development, 3 for Manufacturing Specification, and 4 for Investigation, Experimentation and Evaluation. Anything past a section’s limit is not marked, so it pays to see the limits from day one.
- The rules are written down once. Type at 12 point or larger, colours and fonts from one brand kit, one form for cross-references. A rule in the stylesheet applies to every page, so you don’t hand-adjust twelve tables in Canva.
- Changes are tracked. Git records every change, so you can see what moved between drafts.
- It prints true to size. A browser print at 100 per cent gives a real A3 proof, with true millimetres for checking scales and swatches.
This is the caption rule from the deck’s stylesheet. Every plate caption on pages 1 and 2 uses it, so nobody has to remember the 12 point floor caption by caption:
.caption-row {
  display: flex;
  align-items: flex-start;
  gap: 3mm;
  margin-top: 2.5mm;
  font-family: "PT Serif", Times, serif;
  font-size: 12pt;
  line-height: 1.3;
  color: #1a1a1a;
}
You don’t have to write the code yourself. Agents are good at turning a described change into code. Ask for the change, watch the preview update, and check the result on the page. Acknowledge that help like any other AI assistance.
What the Canva Sync agent does
Canva’s importer can’t read a real stylesheet. So the Canva Sync agent carries the deck across in stages, one way, and stops at the first stage that fails:
- Doctor checks that everything the pipeline needs is installed.
- Build flattens the deck into plain boxes with their styles written inline, the shape Canva reads.
- Verify renders every page from the deck and from the flattened copy, and compares them pixel for pixel. A page fails if more than 0.35 per cent of its pixels differ. All twelve example pages pass, and the worst, page 2, is 0.146 per cent.
- Extract measures every shape, image, and text block into an element list.
- Probe checks that the Canva connector offers the operations the push needs.
- Push sends the pages to Canva, page by page.
- Check reads the design back from Canva and compares it with the repository.
Here is the first caption on page 1 going through Build. The source is short, because the stylesheet does the work:
<div class="caption-row">
  <span class="plate-num">1</span>
  <span><span style="font-style:italic">Wednesday</span>, the school dance dress, my rendered study ...</span>
</div>
The flattened copy carries every style inline (trimmed here):
<div
  style="display:flex;align-items:flex-start;gap:3mm;margin-top:2.5mm;font-family:'PT Serif', Times, serif;font-size:12pt;line-height:1.3;color:#1A1A1A"
>
  <span style="flex:0 0 7mm;height:7mm;border-radius:50%;background:#C8C9D6;font-size:13pt;...">1</span>
  <span><span style="font-style:italic">Wednesday</span>, the school dance dress, my rendered study ...</span>
</div>
Extract then turns that caption into one element with a position and a style. Canva’s A3 page is 1123 by 1588 pixels, so 12 point lands as 16 pixels:
{
  "kind": "text",
  "x": 132.3,
  "y": 738.2,
  "w": 191.0,
  "h": 145.6,
  "text": "Wednesday, the school dance dress, my rendered study ...",
  "size": 16,
  "family": "PT Serif",
  "lh": 1.3,
  "color": "#1A1A1A"
}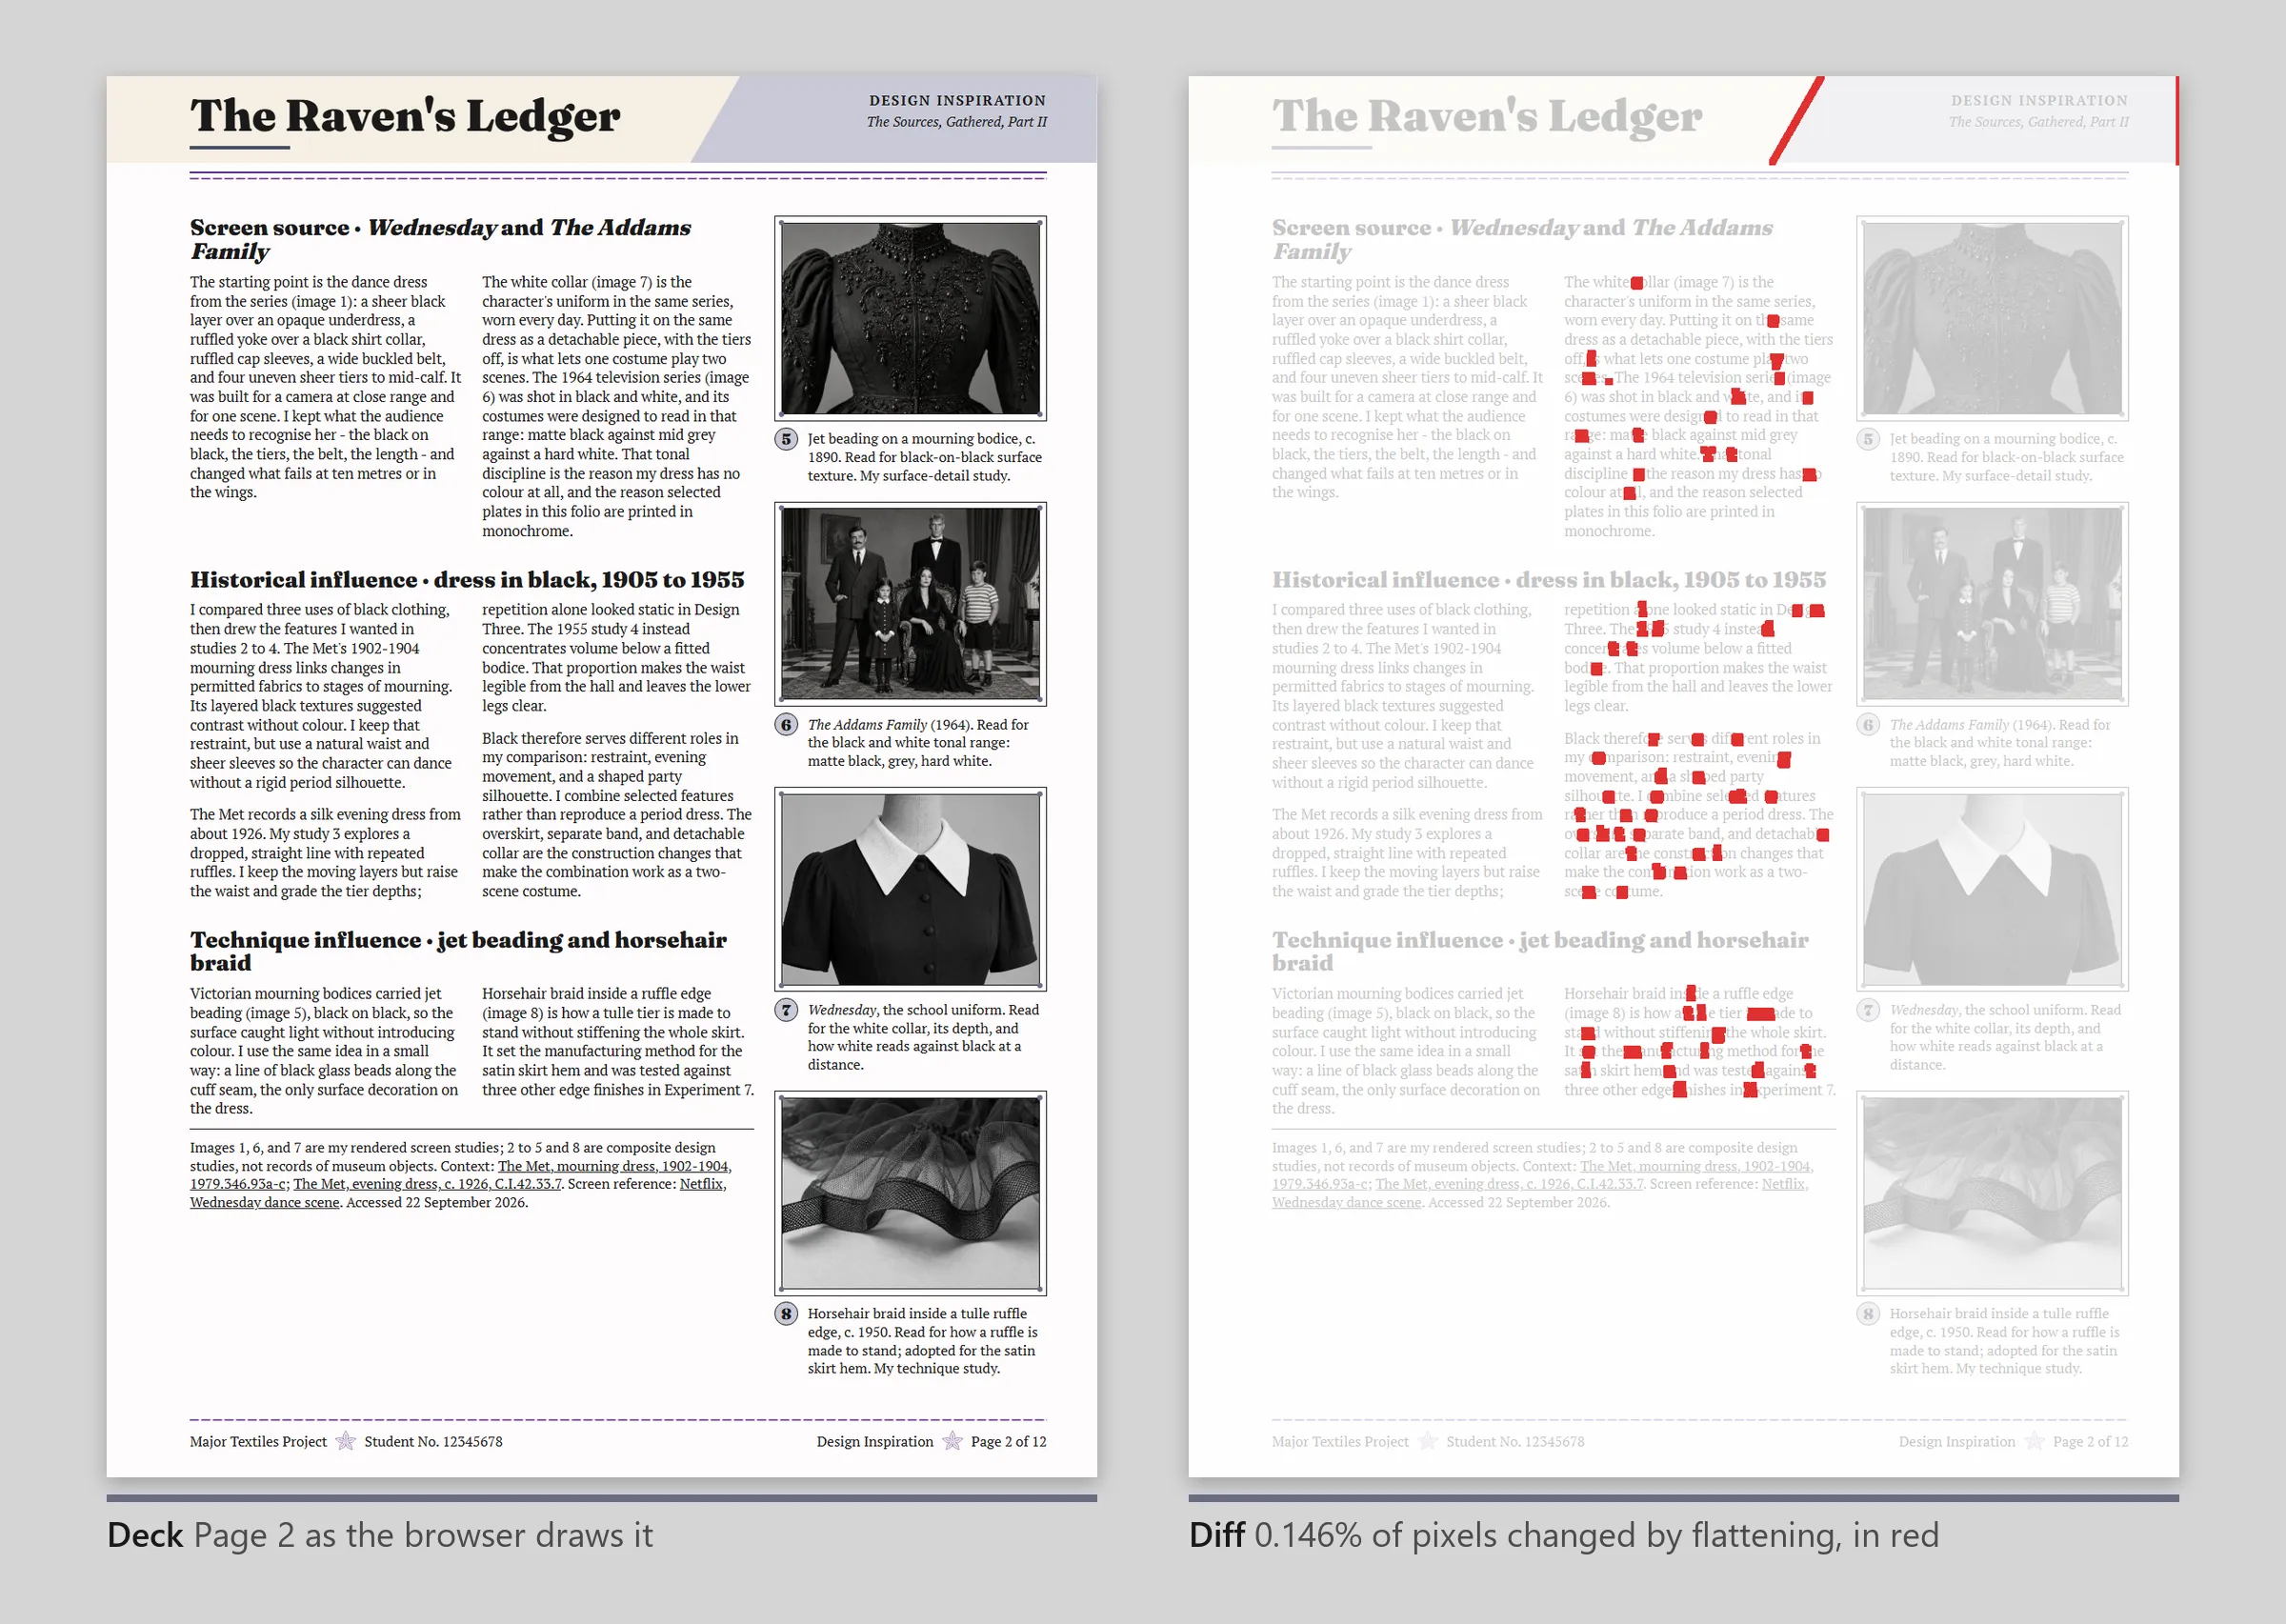
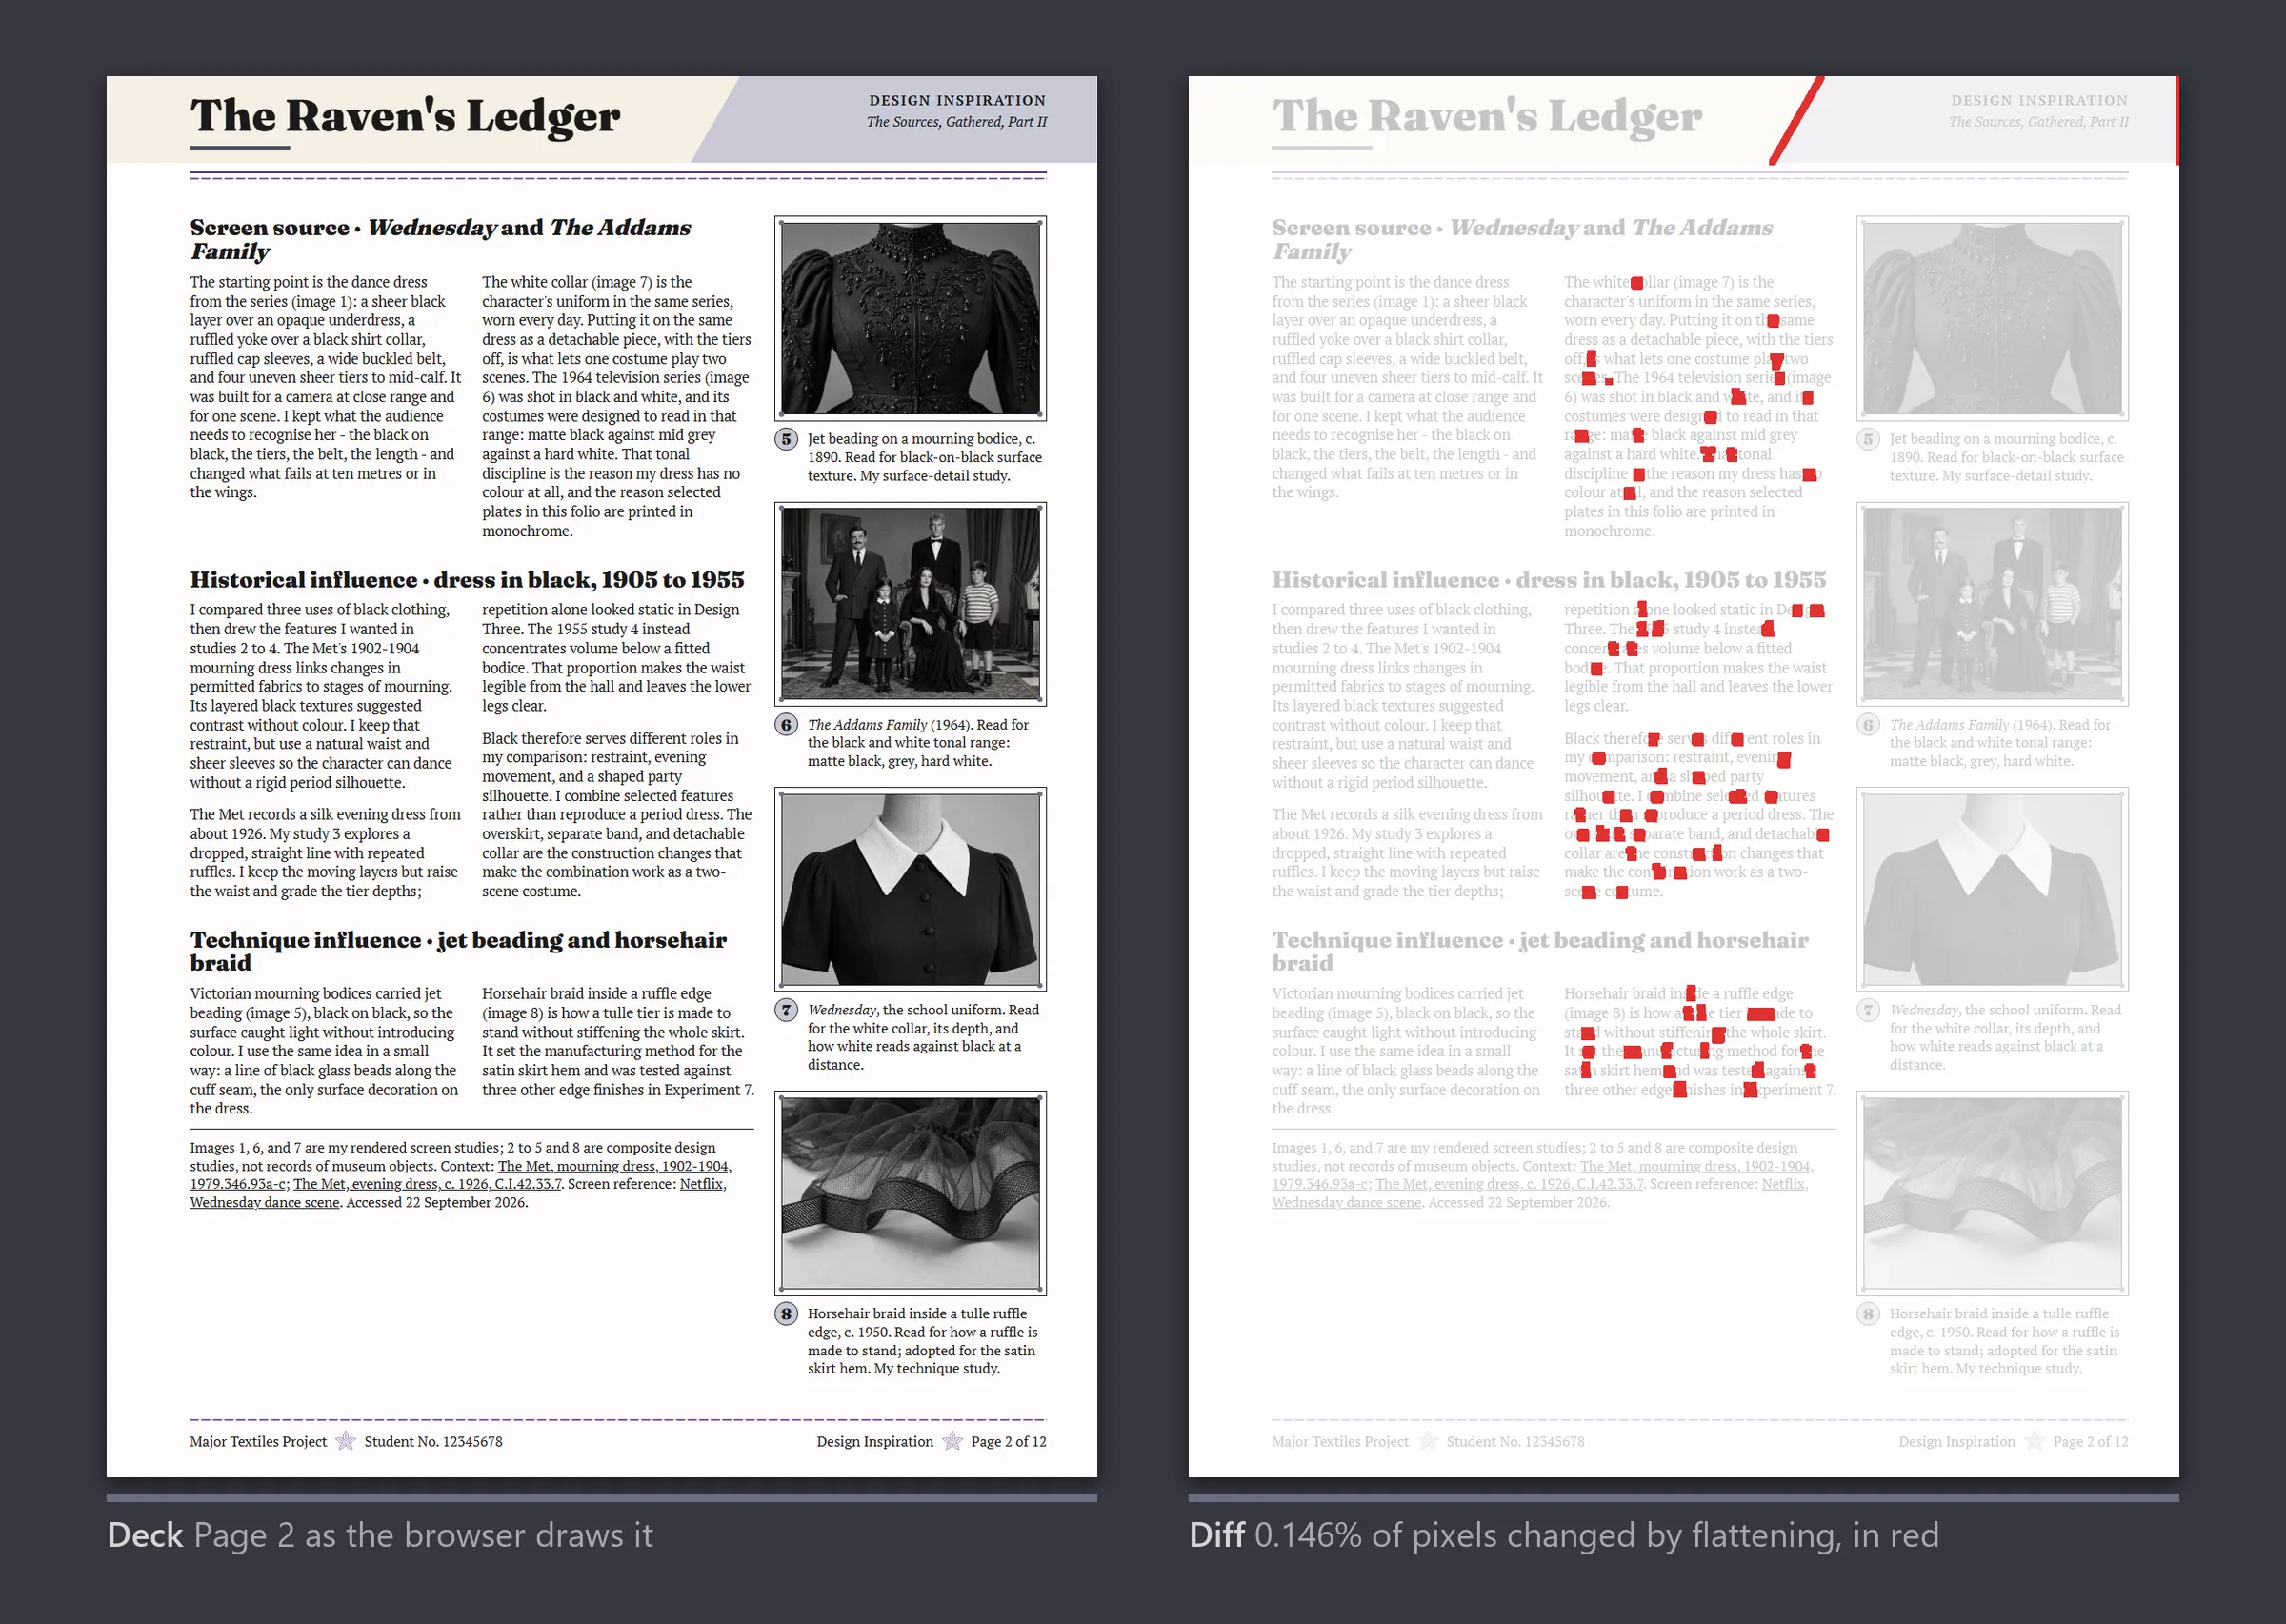
The red is single letters drawn a fraction of a pixel apart, plus the edge of the masthead’s diagonal. Every line breaks in the same place.
Ask your agent host to sync, with page labels (page 01, 03), all, or check:
sync to Canva 01 03With no argument it prepares everything and asks what to push.
The operations the push sends by default are not in Canva’s public MCP documentation, so Probe checks the connector’s tool list before anything is sent, and the first page goes across one chunk at a time and is read back. Canva’s documented public connector can replace text in an existing design but can’t create page elements.
Each page is built as a draft first. The agent shows you the draft beside the repository’s render and lists the differences, and Canva only saves the page when you say so.
What crosses and what does not
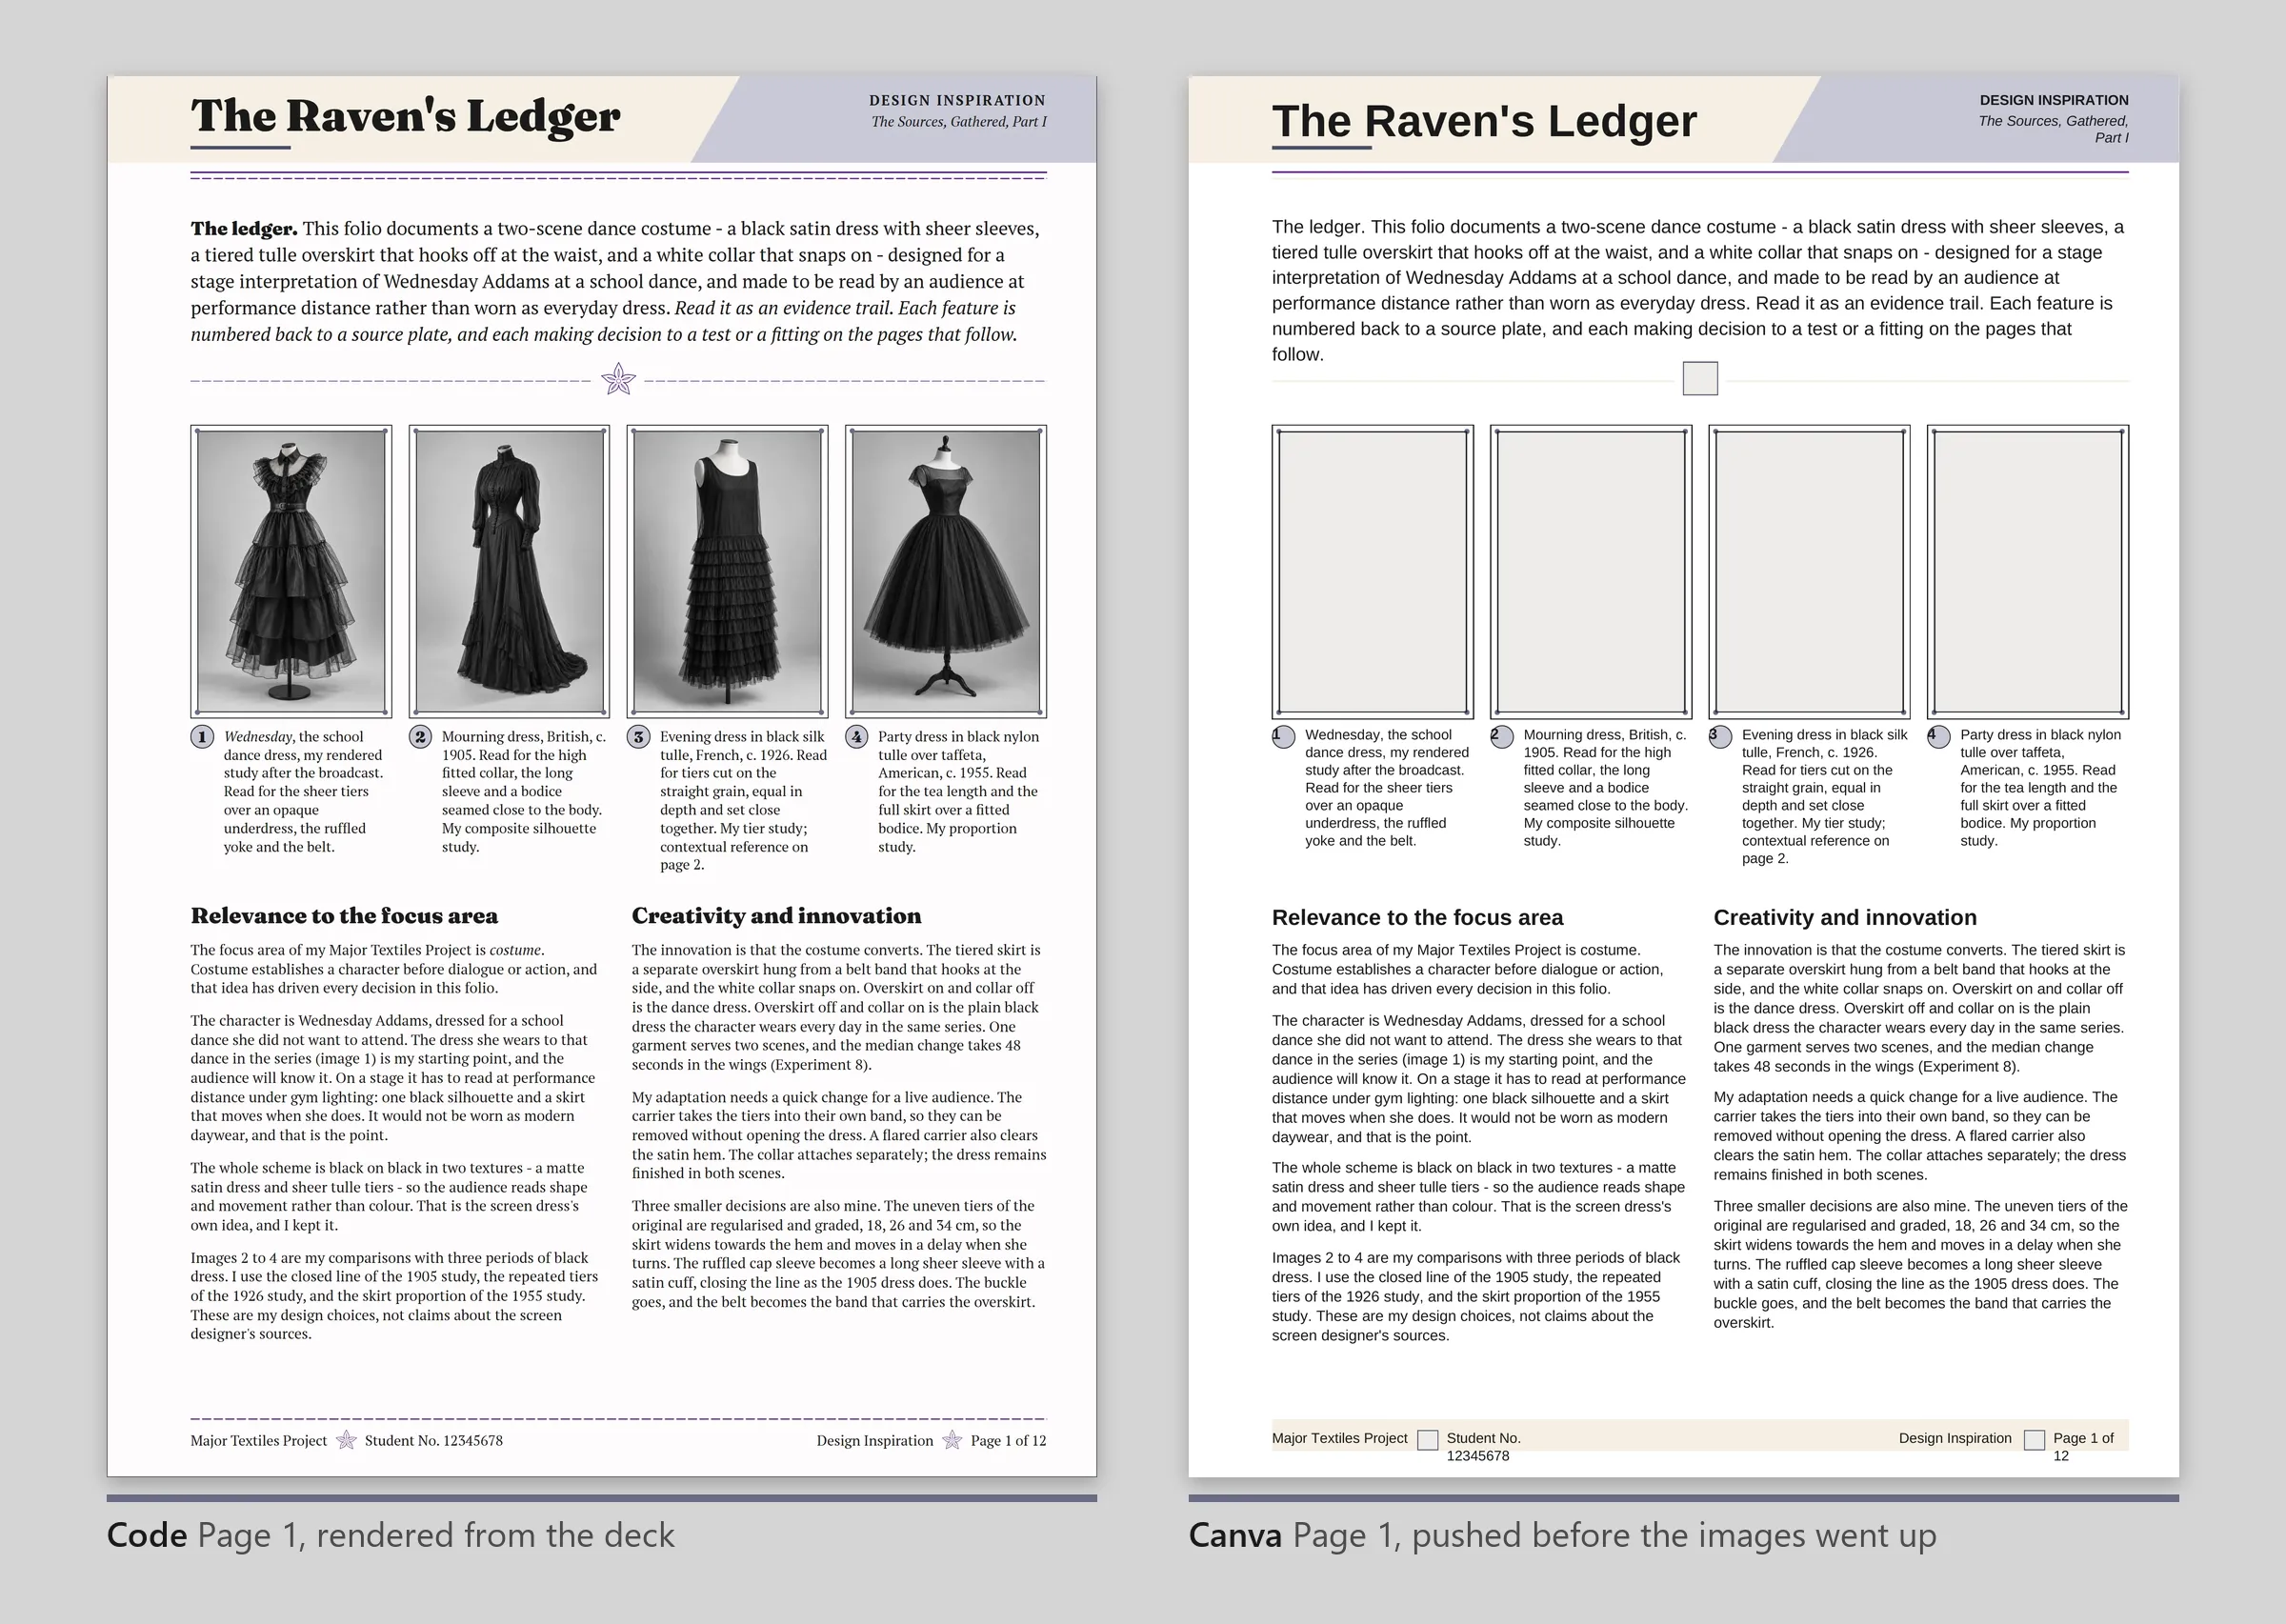
Page 1 went across on 26 September, before any images were uploaded, so the plates are grey placeholders. Click either page to open it full size.
Positions, sizes, layering, colours, text, and alignment all cross, and so do bold and italics when they cover a whole text box. These don’t:
- Fonts. The connector’s format operation has no font family setting, so text lands in Canva’s default face, Arimo, at the right size and weight. Arimo is wider than PT Serif, so some boxes wrap to an extra line. Apply Fraunces and PT Serif from the brand kit in Canva.
- Bold, italics, and links inside a sentence. Wednesday in a caption or an underlined source link comes out as plain text.
- The page colour. Canva pages come out white, not the deck’s off-white, and the connector can’t change it.
- Dashed rules and hatched fills flatten to plain bars and base tones.
Uploading the images
The agent uploads the images itself. The connector’s create-upload-url hands back a one-time upload link, the agent
posts the local file to it, and Canva returns a media id. All 53 folio images went up that way, and the agent wrote
their ids into canva.local.json. The map is keyed by filename, so a renamed image quietly goes stale. Anything
unmapped arrives as a placeholder rectangle to fill in Canva.
The SVG diagrams were the catch. Twelve of them carry PT Serif labels, and Canva’s SVG import swapped in a wider font and cut a caption off at the right edge. The agent rendered those twelve to PNG in Chrome at four times their size instead, so the labels match the deck.
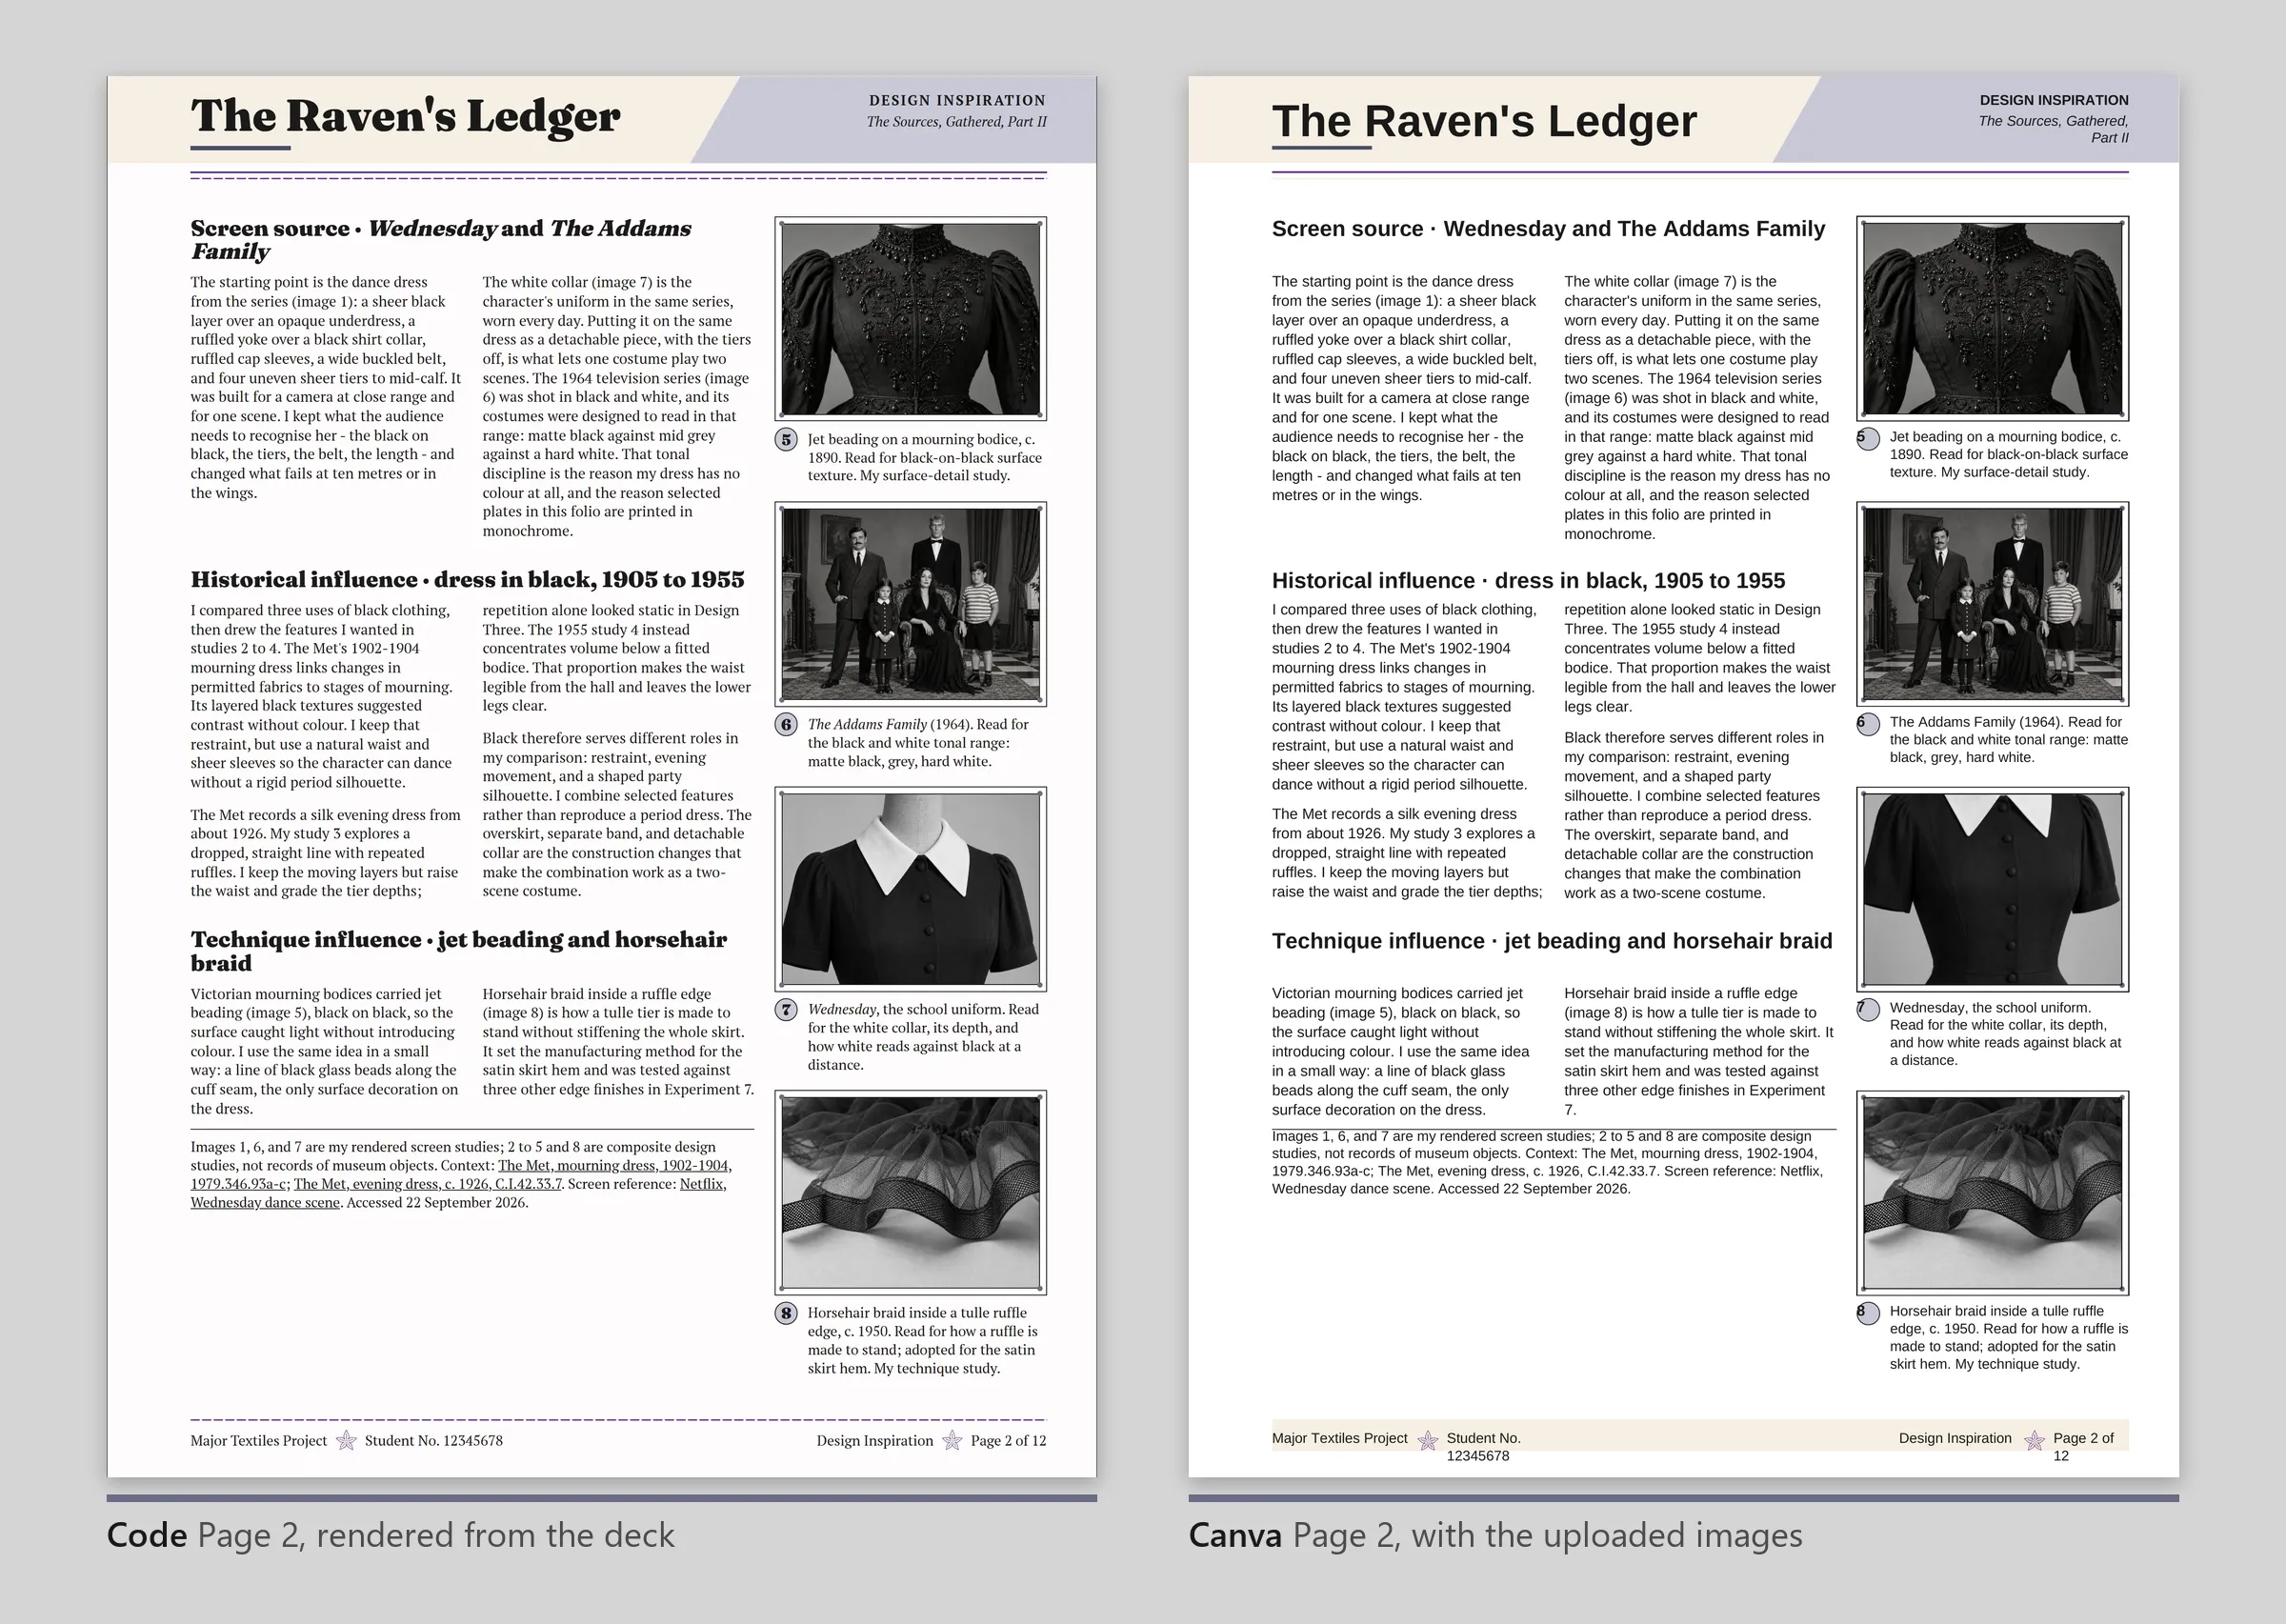
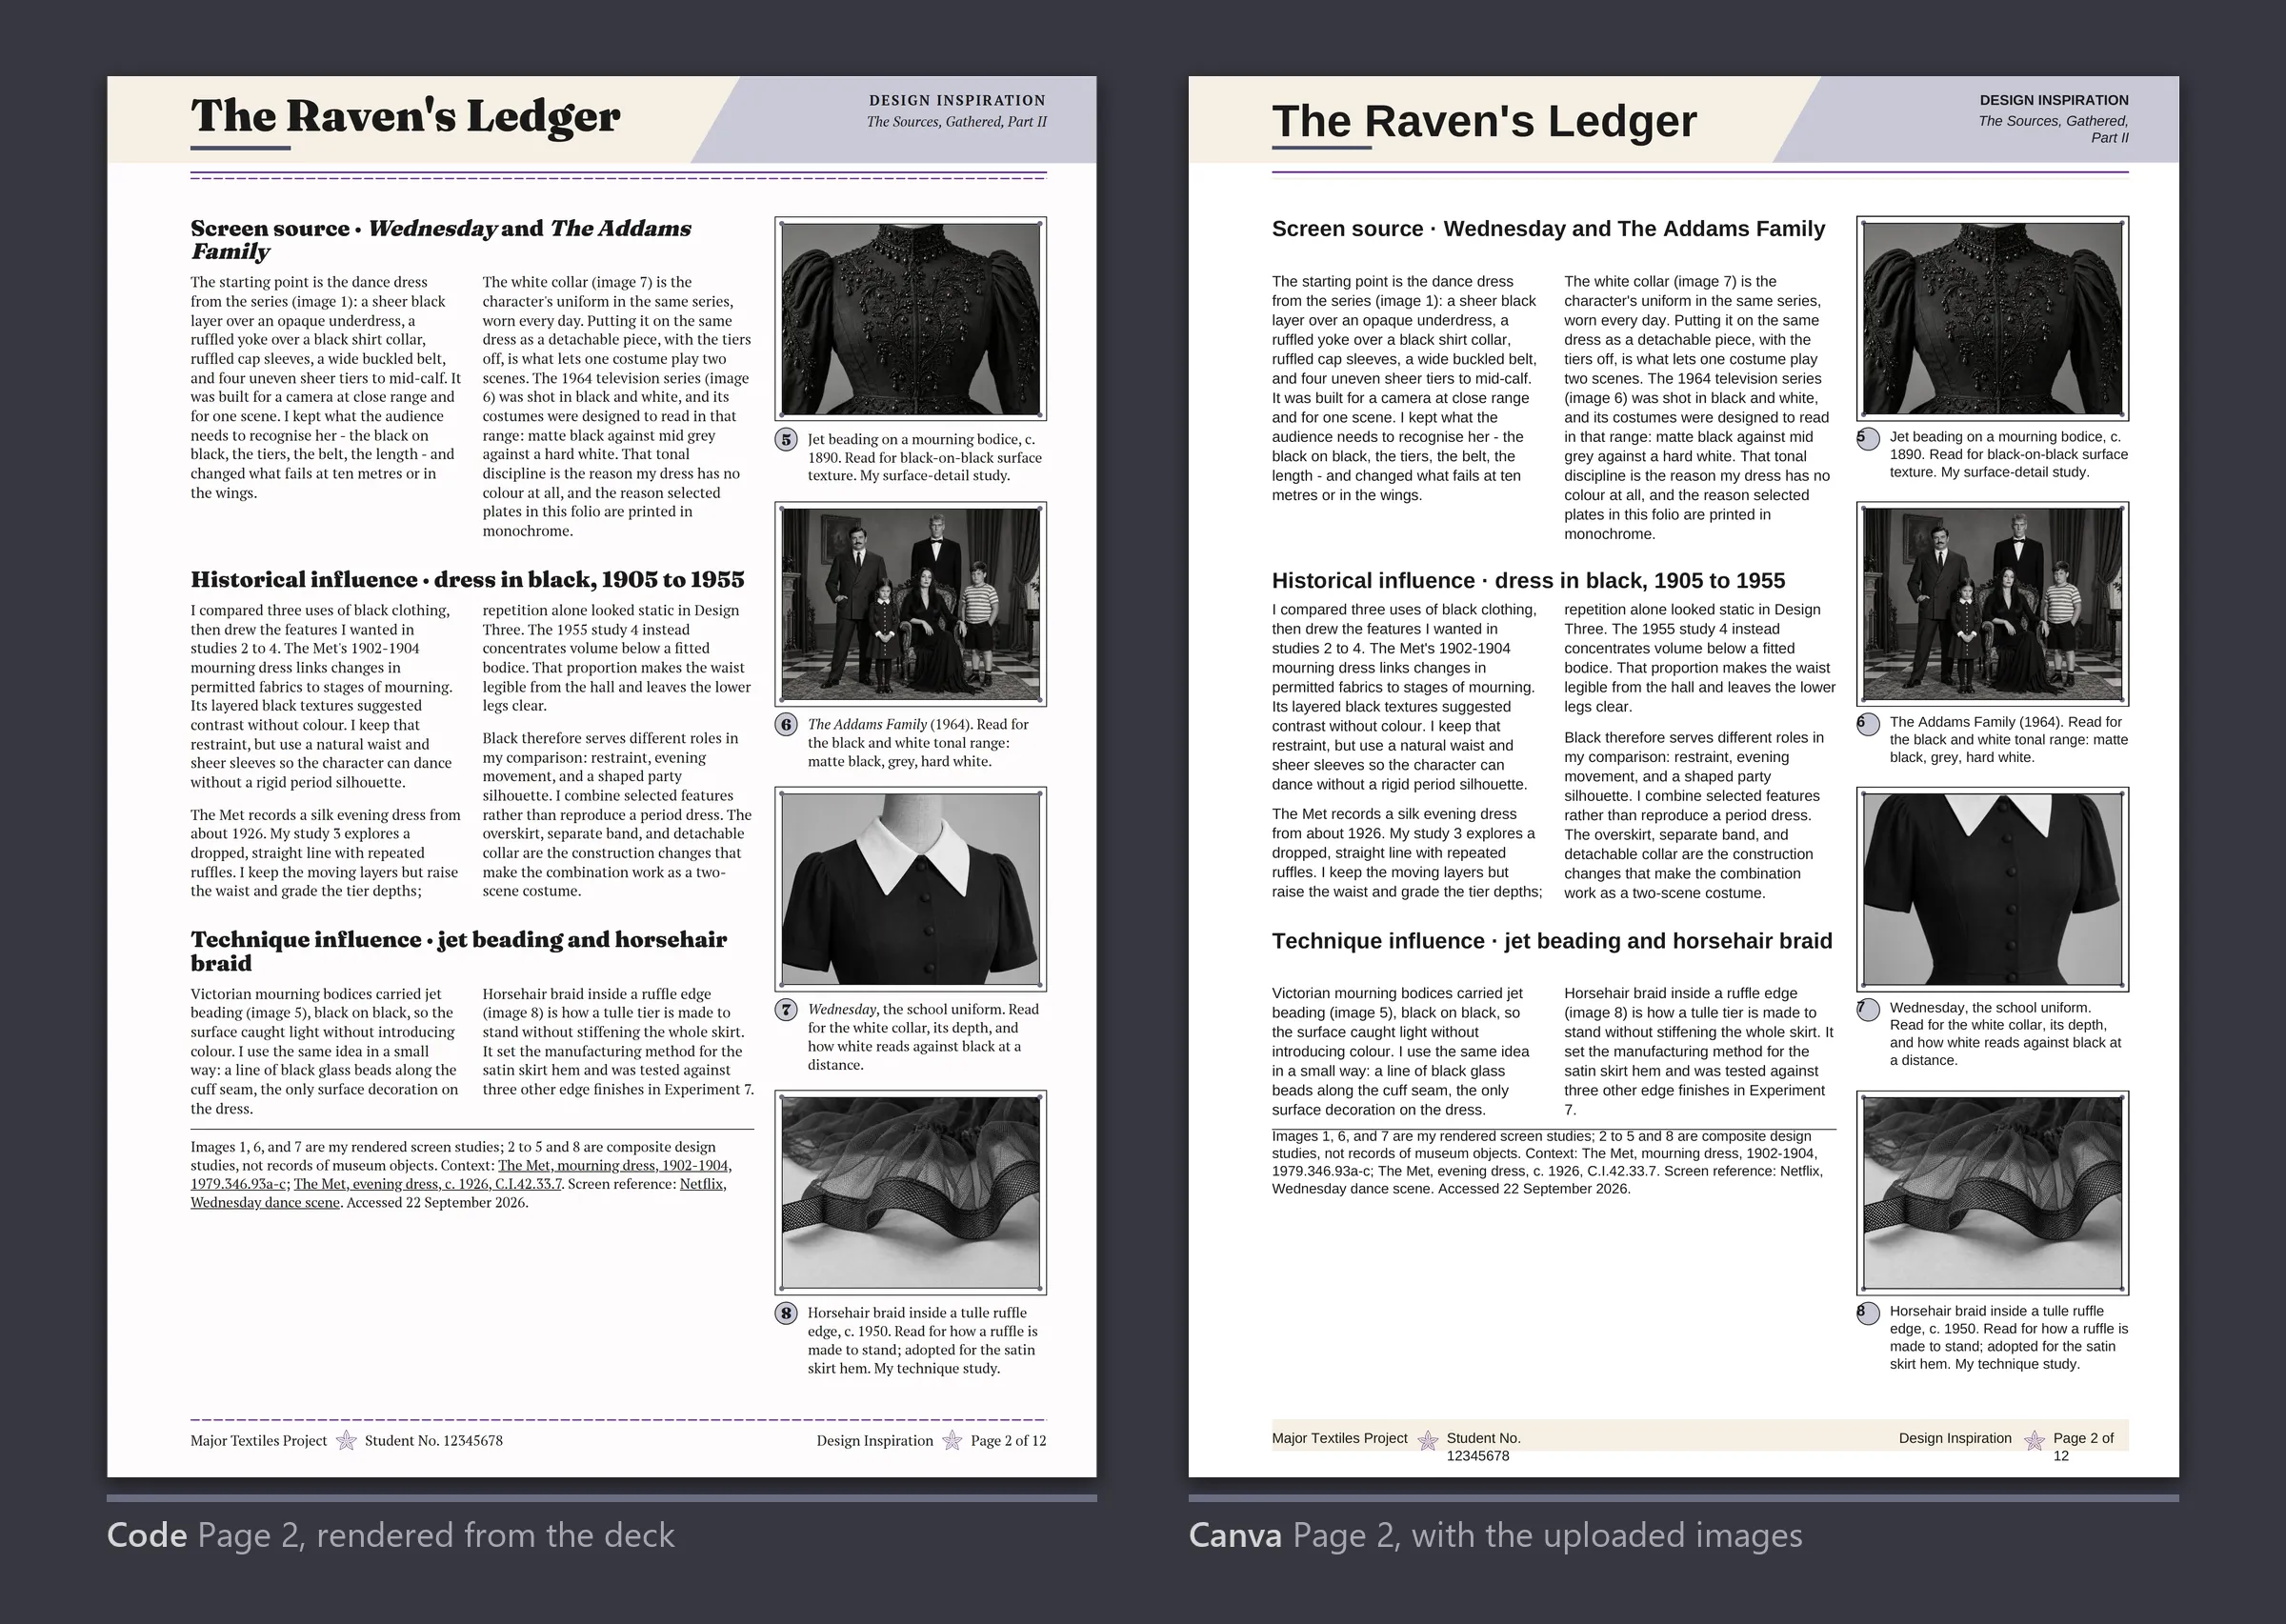
Page 2 went across after the upload, with its four plates and the house marks in the footer.
Fixing overlaps on page 12
Page 12 is the densest page: two columns of evaluation, two tables, and a footer. In the wider Arimo, the same words need more lines. Before saving the page, the agent measured every text box in the draft and found two overlaps. One paragraph in the left column ran 13 pixels into the next, and a cell in the final checks table spilled into the row below. It moved the lower paragraph down 22 pixels and set two table cells from 16 to 15 pixels.
It also caught a bug in the flattener. The masthead breaks between “EXPERIMENTATION” and “AND EVALUATION”, and the flattener dropped that break without leaving a space, so the heading read “EXPERIMENTATIONAND EVALUATION”. The agent sent it with a real line break and noted that pages 9 to 11 have the same bug.
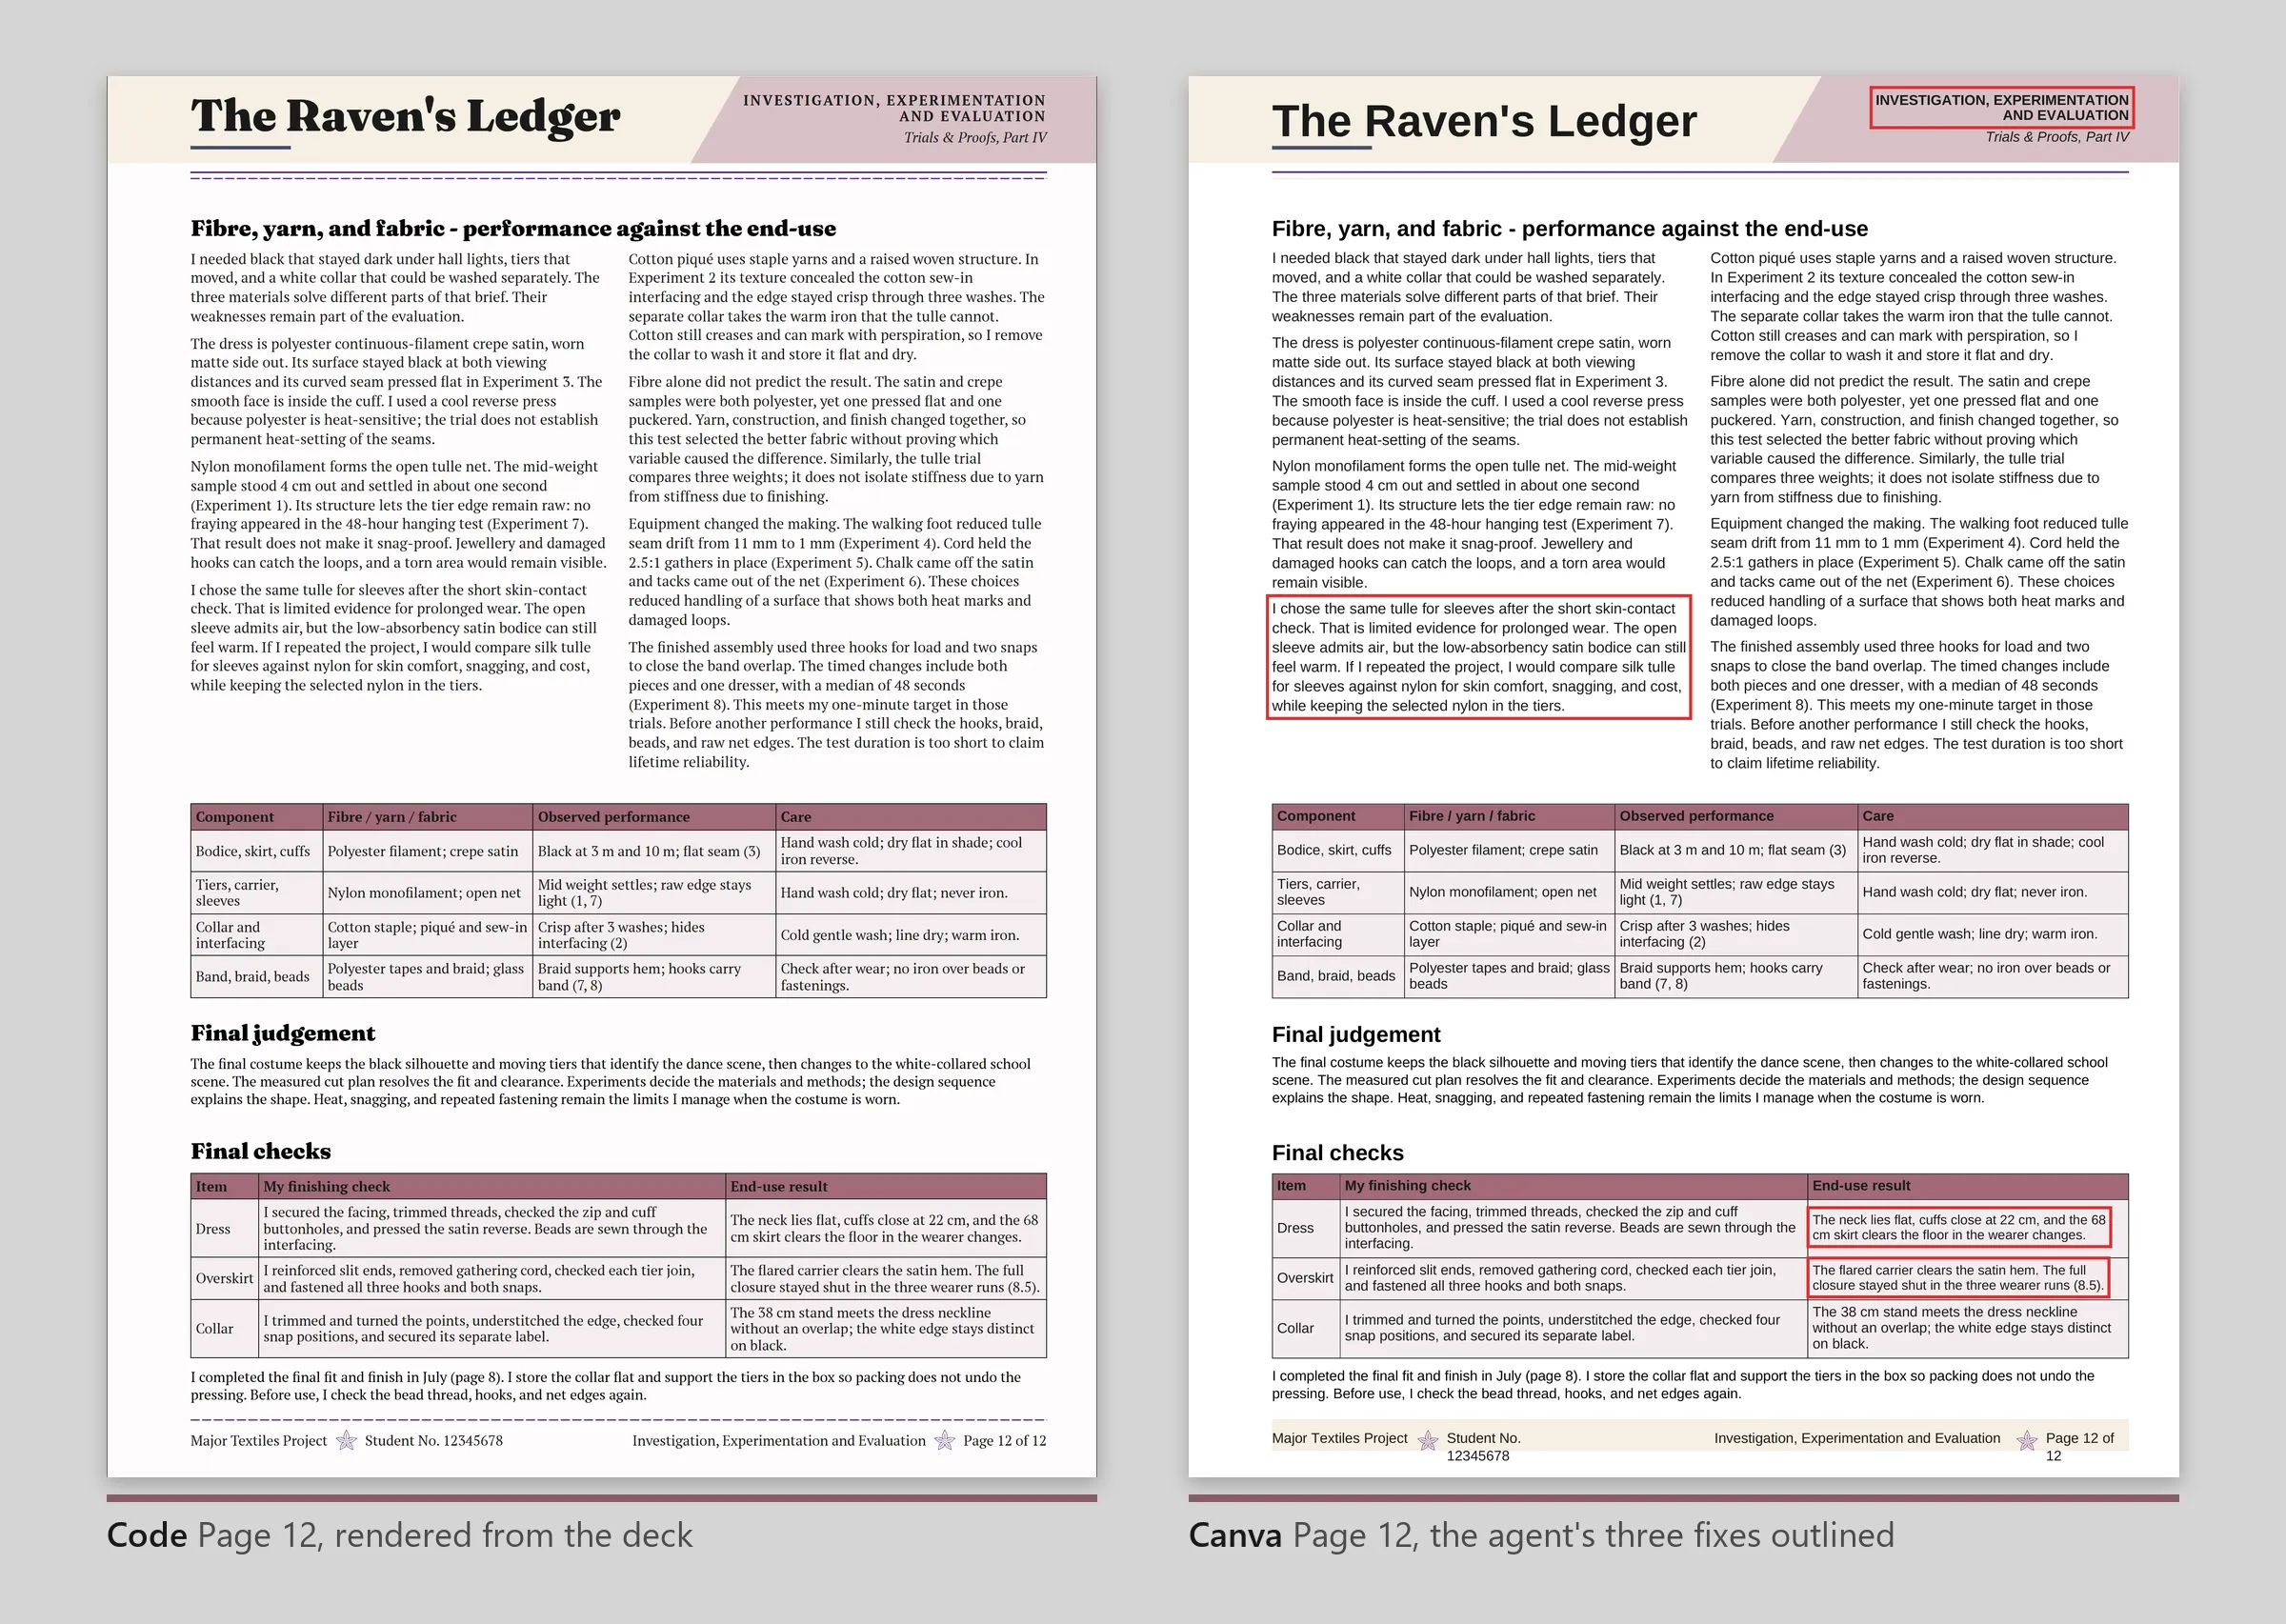
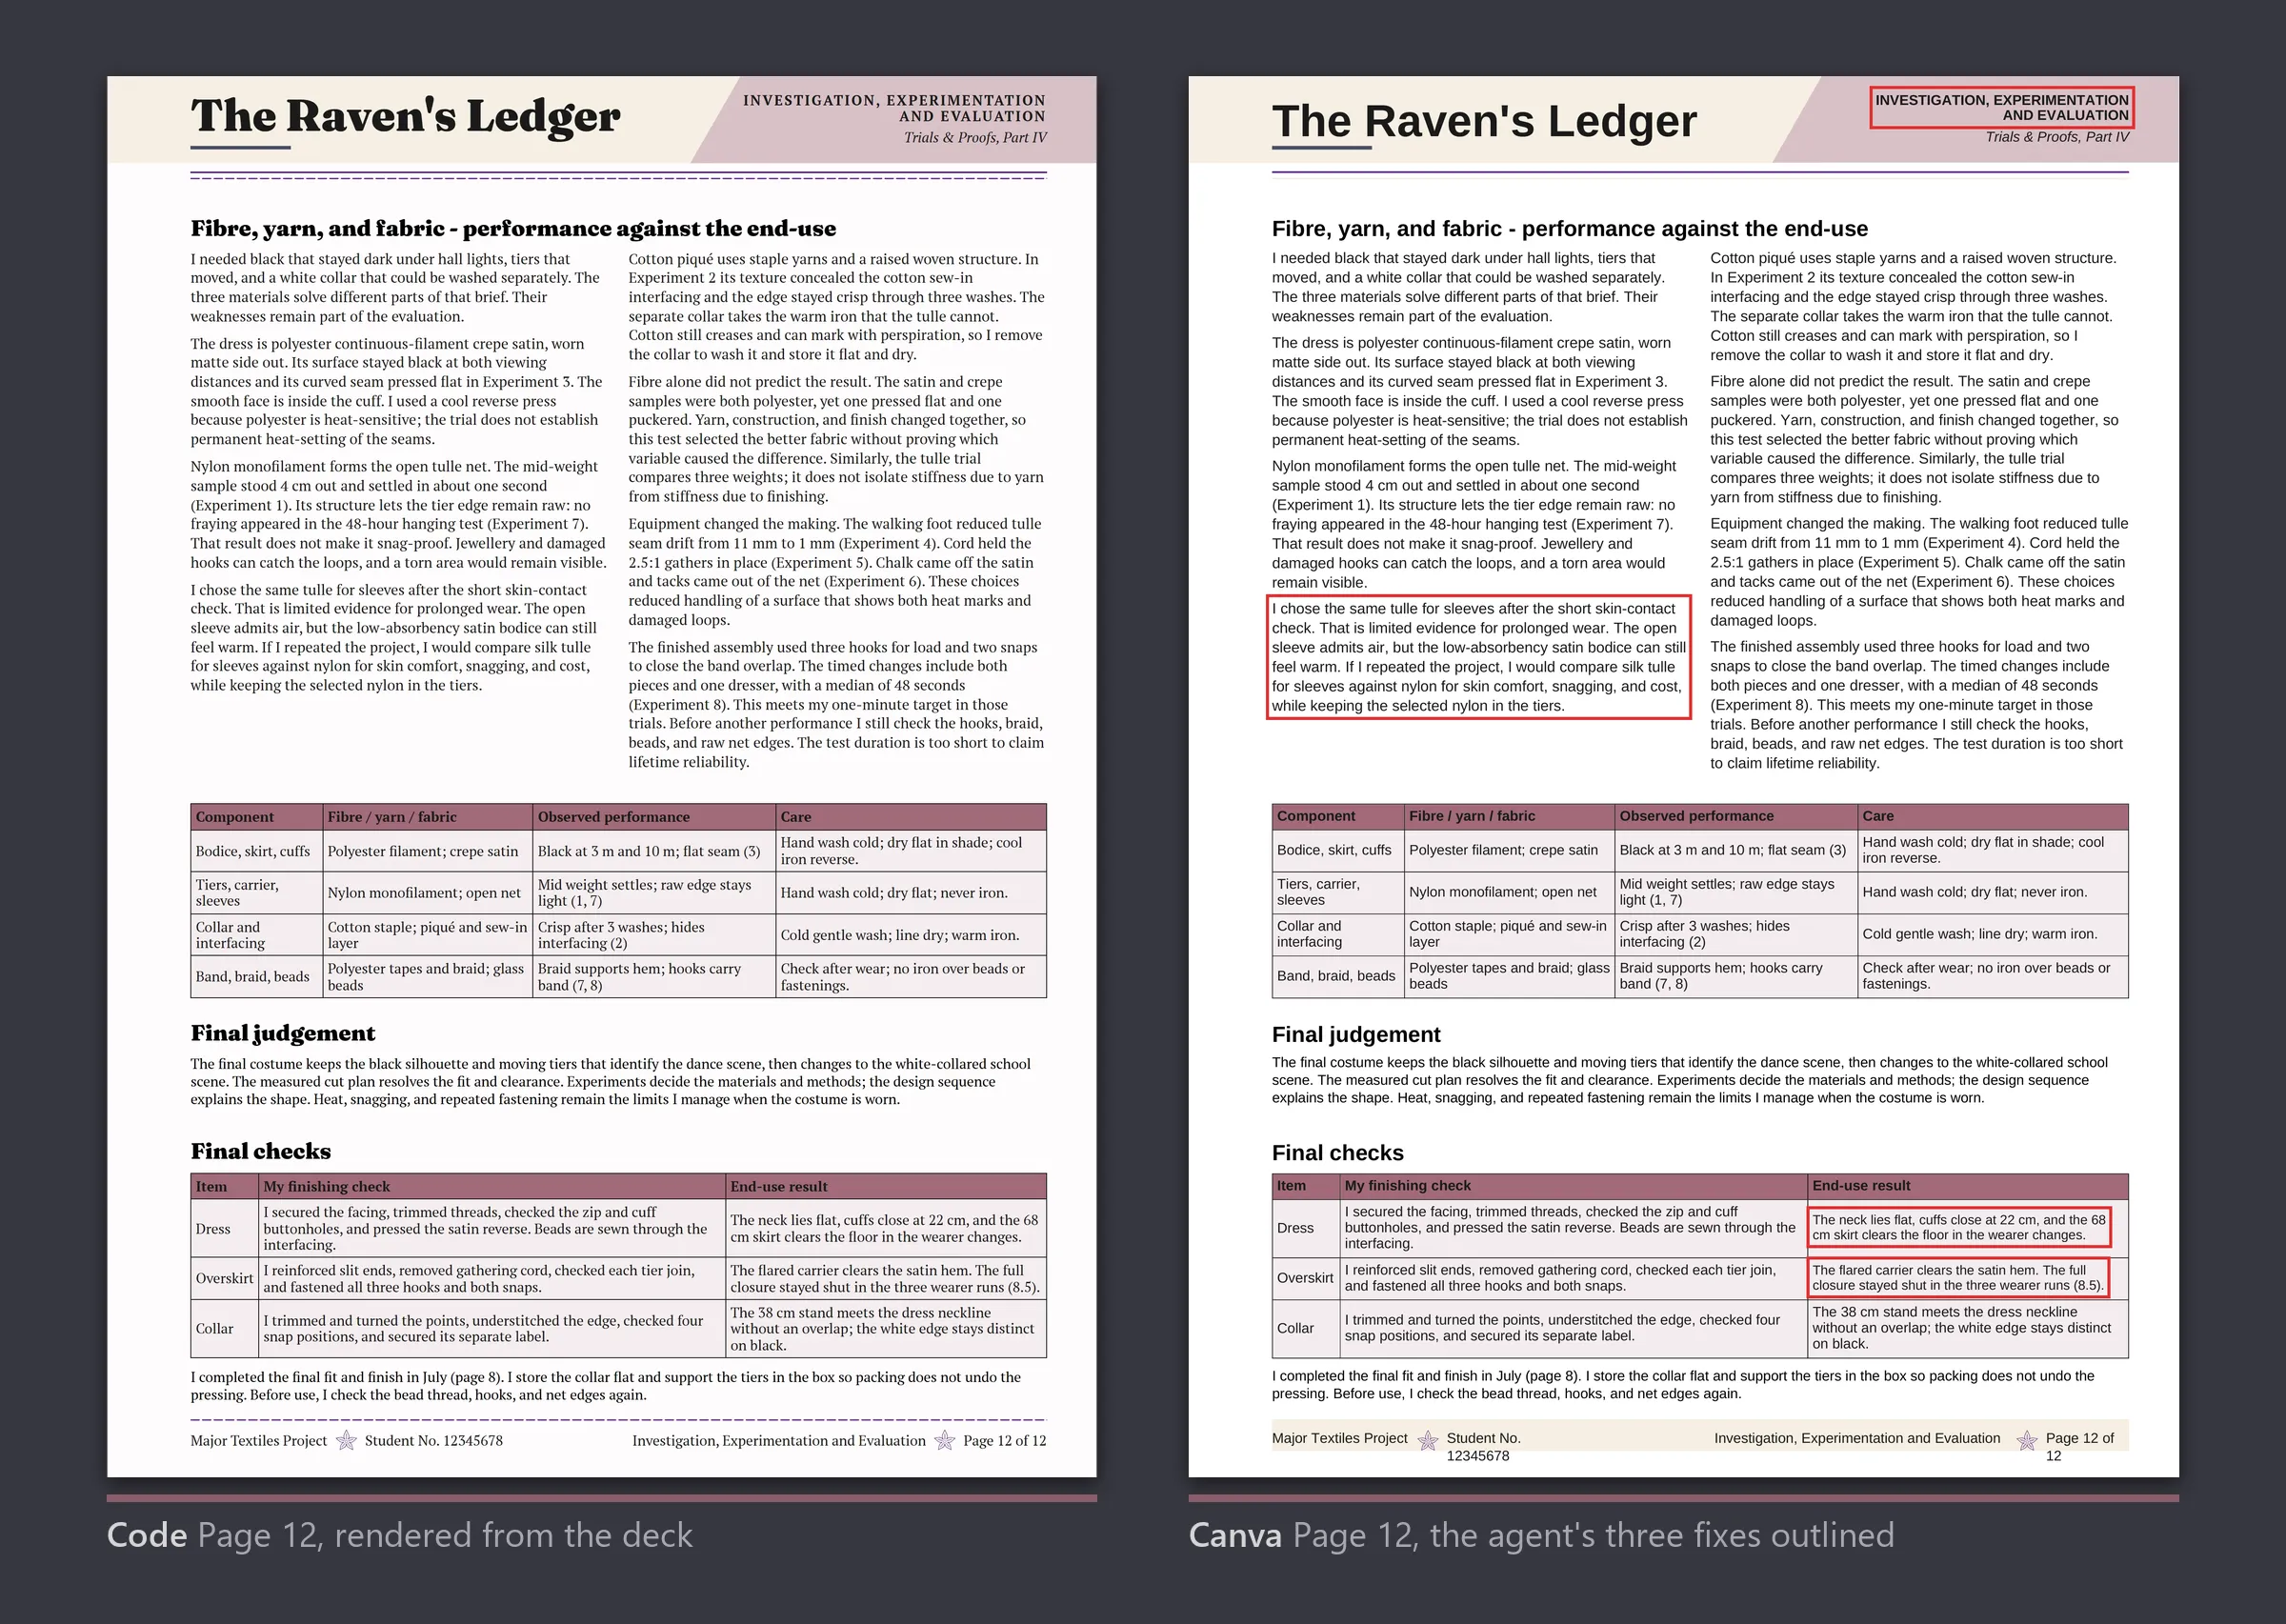
The cell fix broke a rule. 15 pixels on Canva’s A3 page is 11.25 point, under the 12 point floor the stylesheet holds for you in code. The page looks fine and nothing in Canva flags it. Put those cells back to 16 pixels and trim a few words, or give the table more room.
Two ways to work
Keep the repository in charge. Edit the deck in code, push to Canva, and use Canva to view, share, and comment. A change made in Canva is reported as a difference for you to decide about. It is never written back into the deck.
Hand over to Canva. Push once, then have a crack at the design in Canva. From that point your Canva design is the
folio, and the repository is the scaffold you started from. The sync does not pull Canva edits back, and it is not meant
to. check still shows how far the design has moved from where it started, if you want to know.
Most students might like the second way better. That’s fine. The structure, page limits, and type sizes travel into Canva with you. Keeping them as the design changes is up to you. The NESA Assessor agent will still work with a PDF directly from Canva.
Marking the Canva version
The NESA Assessor marks a PDF, and it does not care which tool made it. Export the folio from Canva as an A3 PDF and give the assessor its path:
Mark the folio at output/my-folio-from-canva.pdfThe assessor measures that file the same way it measures any other: page count and size, the smallest text on every page, image and swatch sizes, scales, and totals. Then it marks each section against the NESA descriptors. Designing freely in Canva makes those checks more useful, not less. It’s easy to shrink text below 12 point or push a section onto a thirteenth page while moving things around. The agent’s page 12 fix did the first.
Before you print for submission, check the Canva PDF at 100 per cent. If a drawing states a scale or a swatch claims a size, measure it on the printed page.
Without a connector
Every step up to the push still runs, and the agent says the push needs a connector. build --pdf also writes a
true-size A3 PDF of the twelve pages, about 100 MB because the plates are embedded at print resolution. Canva can upload
it, but the result is harder to edit. The
Canva sync docs cover the other
routes.
Anticipating change
Both Claude and Canva evolve by the week these days. If the sync fails, ask your agent to fix it. The sync code is all in the repository and adjusting code is where agents really shine. If it still does not work, open a issue on the repository for help.
What you need
- An editor, such as VS Code, for writing and managing your content.
- An agent host, for example Claude Code, GitHub Copilot, or Codex.
- Python 3.12 or newer, with the packages in
requirements.txt. - Chrome or Edge, for rendering pages during Verify.
- A Canva connector for the push. I.e. for Claude, add the Canva web connector in the Claude settings.
canva.config.jsonat the repository root, and a localcanva.local.jsonfor your Canva ids. The agent records the page and image ids there as it goes.
Run Doctor first. It names whatever is missing:
python .agents/skills/canva-sync/scripts/canva_sync.py doctor